
Once the Twilio account (see ‘Twilio Set Up’), and the Reminder Message Content (see ‘Message Content’) have been set up the next step is to test reminders with one patient. It is suggested that you have a ‘fake / test’ patient (e.g Mickey Mouse) for testing purposes, and that that patient’s mobile telephone number is listed as a verified number under the Twilio Dashboard (www.twilio.com).
Before upgrading your Twilio account, SMS reminders can only be sent to ‘verified
numbers’ as listed on your Twilio account
- From the Twilio Dashboard, select ‘Manage Numbers’.
- Select ‘Verifed Caller IDs’ fron the options available.
- Make a note of the telephone numbers that have been verified.
- From the Consentz Control Centre, select the ‘Patient’ tab.
- Confirm your ‘fake / test’ patient has a mobile number that is on the Twilio Verified Caller IDs list as viewed in Step 3.
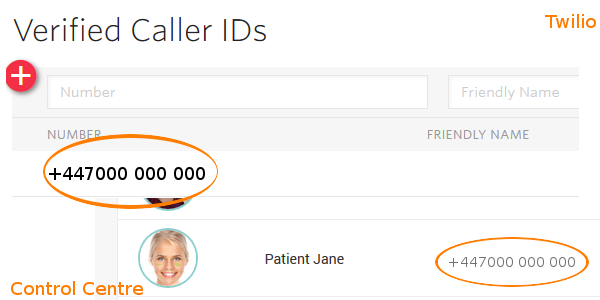
- From the Control Centre select ‘Settings’ followed by ‘Messaging’ and ‘Appointment Reminders’.
- Make a note the ‘Reminder Interval’ time that has been set.

In order to test the Reminder message, you will need to create an appointment for the ‘fake / test’ patient that is due to start at a time later than the ‘Reminder Interval’.
- Select ‘Scheduling’ and ‘Calendar’.
- Click the ‘+’ button.
- Select a Practitioner.
- Select the ‘fake / test’ patient.
- Select the ‘Start Time’ that is the current time plus at least the Reminder Interval. For instance, if the current date is January 1st 1pm, and the interval is set to ‘1 Day’, then the test appointment should be created for no earlier then January 2nd at 1.30pm (ie. the Interval time of 24hrs plus some additional margin for error).
- The SMS Reminder will be sent to the verified telephone number attached to the ‘fake / test’ patient.
If you wish to roll out SMS Reminders to all your patients, you will need to ‘Upgrade’ your Twilio account. This can be done from the Twilio Dashboard.