
A clinic can be set up with the ability for patients and prospective patients to book their appointments via an online portal. Online booking is available for any clinic but does require a number of steps to be completed before appointments can be made.
Steps for Online Booking
- Set up the Practitioner availability times & treatments
- Set up Treatment information
- Set up Price List items
- Set up confirmation emails
- Set up the online booking widget & payment options
Step 1 : Set up the Practitioner availability times & treatments
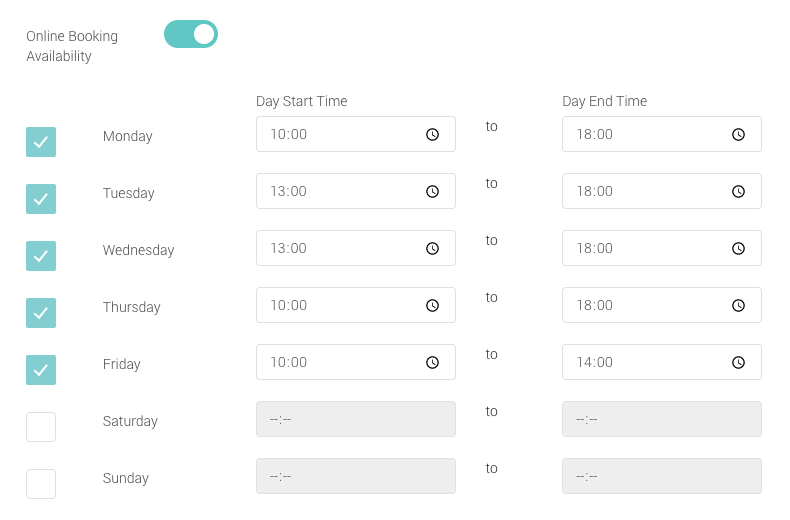
- From Control Centre menu drawer menu, select ‘Settings’, followed by ‘Team’ and edit the Practitioner you want to be made available for online booking
- Under ‘Treatment(s)’ select all the treatments that the Practitioner administers
- Toggle the ‘Online Booking Availability’ so the toggle is active
- Select the times and days that you wish to make the Practitioner available for online bookings. These times do not have to reflect the total working hours of the practitioner
- Add a summary text. This will be displayed alongside the practitioner information when booking appointments
- Click Save
Step 2 : Set up Treatment information (optional)
Treatments associated with Practitioner in Step 1 can have additional content added to confirmation emails when booked online. This additional content can be in the form of instructions to be performed by the patient prior to the appointment, advance notice to possible side effects or a post-procedure period of discomfort.

- From the ‘Set Up’ menu, select ‘Treatments’ and select a Treatment
- Look for the field ‘Pre-Treatment Instructions’
- Enter the instructions you wish to send the patient and click ‘Save’
Step 3 : Set up Price List items
During the Booking Process, after selecting a Treatment, the user will be able to select a Price List item.

- From the ‘Set Up’ menu, select ‘Price List’
- Locate all the price list items that you wish to be available for online booking
- Add a ‘Purchase Price’ and ‘Online Deposit’ Price – these will be used if you require payment to be made when booking an appointment
- Group the Price List items by adding a ‘Treatment’ – these items will be displayed when a treatment is selected
- Add a ‘Description’ – this can be used to add detail to each Price List item
- Click ‘Save’ at the end of the item line to save changes
- Tick the tick/cross button in the first column to make the Price List item available for selection – these will only appear after Step 5 has been completed
- Repeat for each Price List item that will be available online
Step 4 : Set up confirmation emails
Once the booking process is complete, the user will receive a confirmation email, the content of which can be tailored. Details of the appointment will be automatically included.
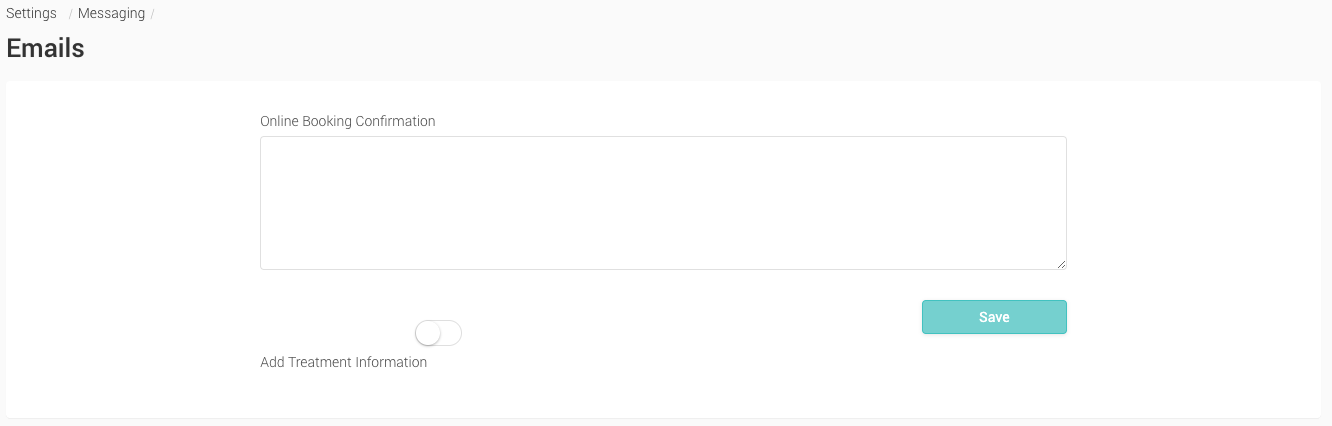
- From the ‘Settings’ menu, select ‘Messaging’ followed by ‘Emails’
- In the ‘Online Booking Confirmation’ field, enter any content you wish to be sent with all confirmation emails.
- If you would like to include specific treatment information (see Step 2 above), toggle the switch next to ‘Add treatment information’.
- Click ‘Save’
Step 5 : Set up the online booking widget & payment options
The final stage is to active Online booking, attach a Stripe account for payment collection and attach your ‘terms & conditions’
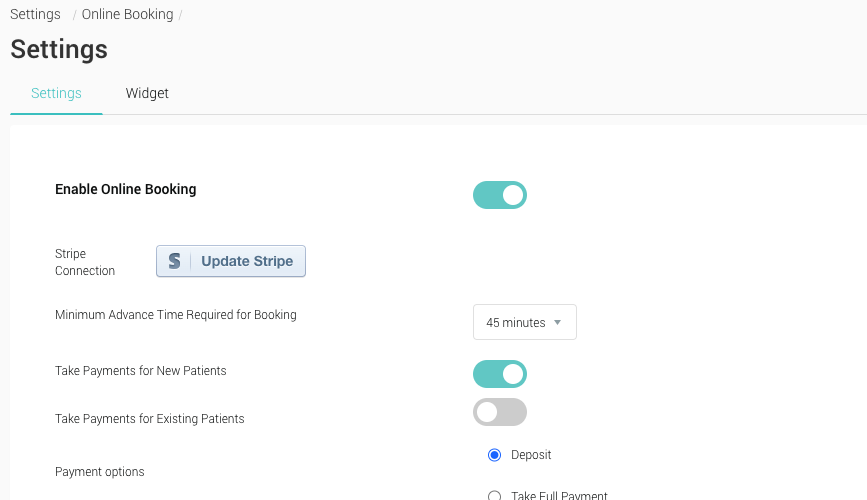
- From the ‘Settings’ menu, select ‘Online Booking’
- Toggle the switch to ‘Enable Online Booking’, and the ability to connect with an online payment method will appear
- Click the ‘Connect with Stripe’ button, fill out the form and create a ‘Stripe Account’ if required.
- Return to the Online Booking Menu once connected with Stripe
- Select a Minimum Advance Time – this sets the gap between the time that a user logs on, and the first available appointment they are presented with
- Toggle either of the toggle switches to require payment when booking appointments. Existing patients are those that log into the system with their username, all others will be considered new. Select the radio button to take either a ‘deposit’ or the ‘full payment’ when requesting payment
- Finally, copy your ‘Terms and Conditions’ into the text field
- Click Save
- From the menu options at the top, select ‘Widget’, which will switch the screen to the options for setting up the online booking widget
- Enter a width for the widget, and select a theme
- Add any customization to the widget if required
- Click the Generate preview button to see what the widget will look like
- Right at the bottom of the screen will be the embed code, use this code on your website to enable the widget and allow users to book appointments online.

Insert your code into your website to embed the online booking widget onto your website