
Membership plans allow for the creation and management of memberships. Plans can be created and then assigned to patients. Linking directly with Stripe, the patient’s payment details can be added so that monthly payments will be taken for the duration of the plan.
Setting up Stripe
Before you begin with setting up a membership plan it is required to link a Stripe account.
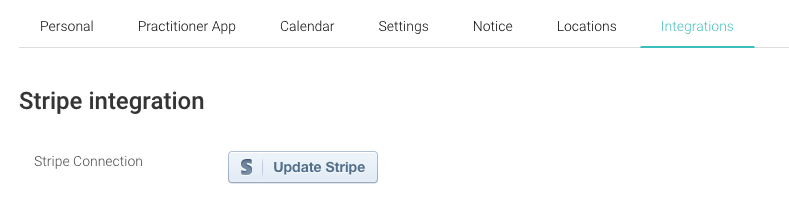
- On the Control Centre, navigate to Settings -> Profile
- On the Profile page select the Integrations menu option
- If Stripe has already been set up the button will read “Update Stripe”. No further action should be necessary
- Otherwise, please press the Stripe button and follow the steps to link your Stripe account with Consentz. You can create a new Stripe account during this process if required
Adding Webhooks to your Stripe account
Once your Stripe account has been created and is linked with Consentz you can add the required “webhooks” to the account. These allow Consentz to programatically manage the membership payments.
- Log into your Stripe Account
- In the left hand options column select “Developers”
- Select “Webhooks”
- From the section entitled “Endpoints receiving events from your account” click the “Add Endpoint” button

- A new pop up window will appear
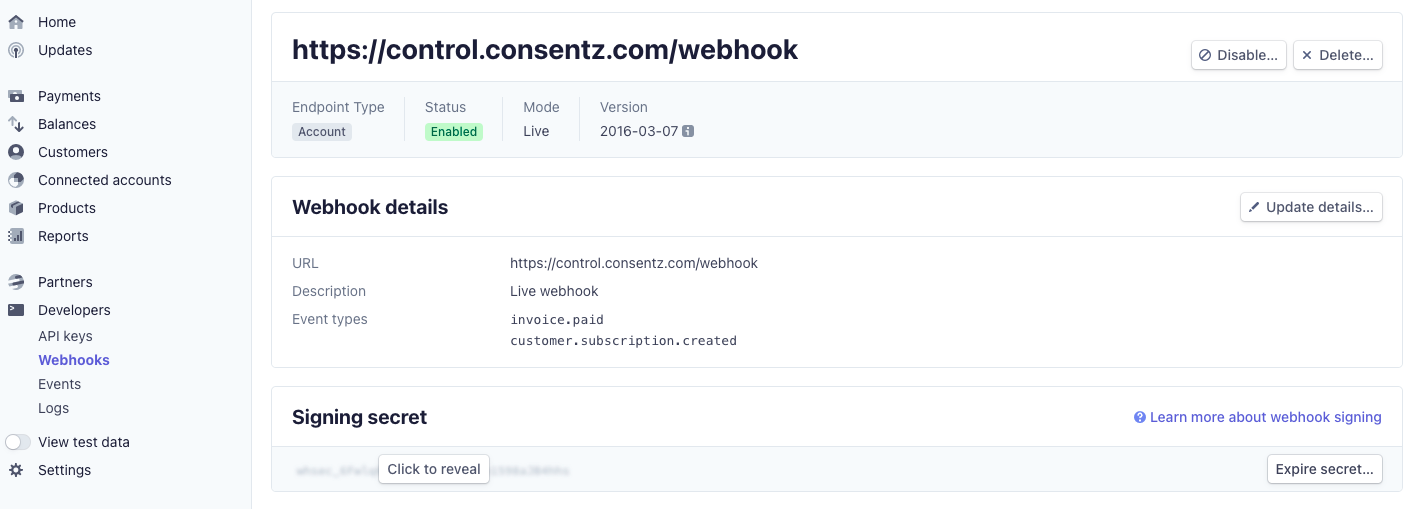
- In the field titled “Endpoint URL” add the following url data: https://control.consentz.com/webhook
- In the field titled “Events to send” select the following two options: invoice.paid &
customer.subscription.created - Your newly created webhook should look like the below image
Creating a Plan
With the Stripe connection established you can now create your first Membership Plan.
- On the Consentz Control Centre navigate to the Set Up – Membership Plans
- Press the + button to create a new Plan
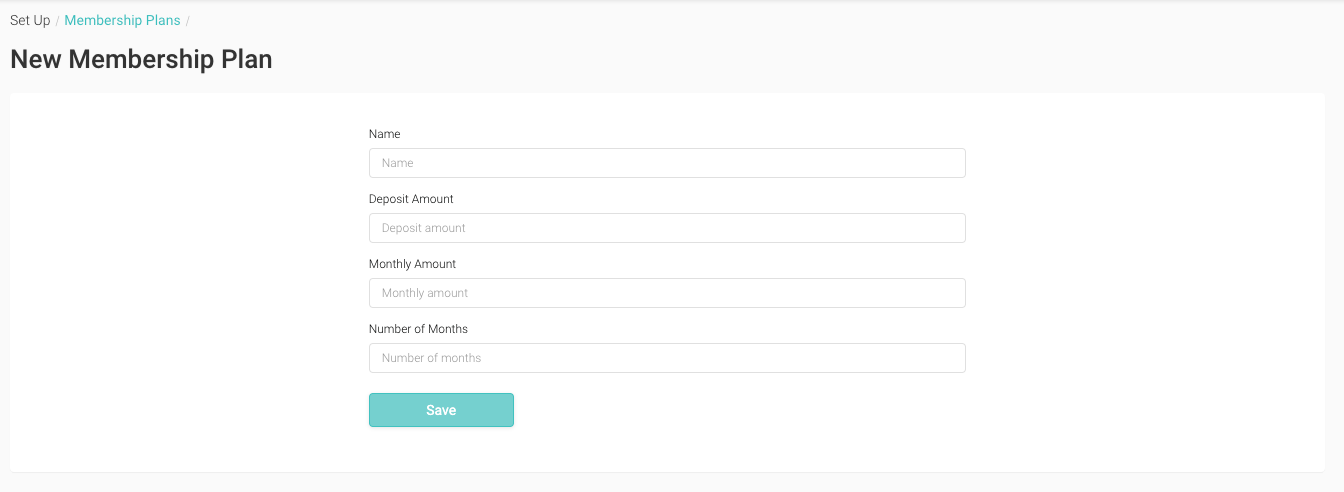
- Name – The name of the Plan
- Deposit Amount – The amount of the first payment to be taken from the patient
- Monthly Amount – The repeating amount to be taken from the patient each month for the duration of the plan
- Number of Months – The total number of months in the plan
- Once completed press “Save”
- The new plan will be visible in the Membership Plan page
- Click the Title of the new Plan to add products & treatments into the plan (the “offer”)
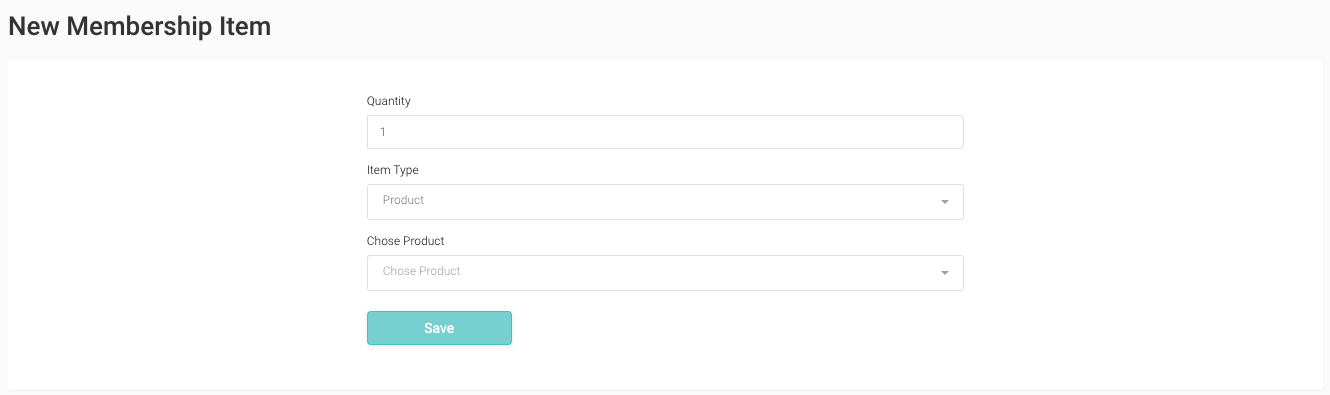
- Quantity – The amount of the product/treatment that will be offered to the patient during the membership
- Item Type – Select from either products or treatments to affect the next selection
- Choose Product/Treatment – Select the product or treatment to be offered
Repeat this step until all the items that will be offered in the plan have been added to the plan.
Enrolling a patient into a Membership Plan
- Select the patient you wish to enrol from the Control Centre – Patient
- From their profile page select Account -> View Memberships
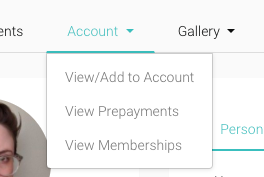
- Click the + button
- From the pop up window select the Membership Plan you wish to enrol the patient into, and assign a practitioner
- You will be redirected to Stripe to set up payment
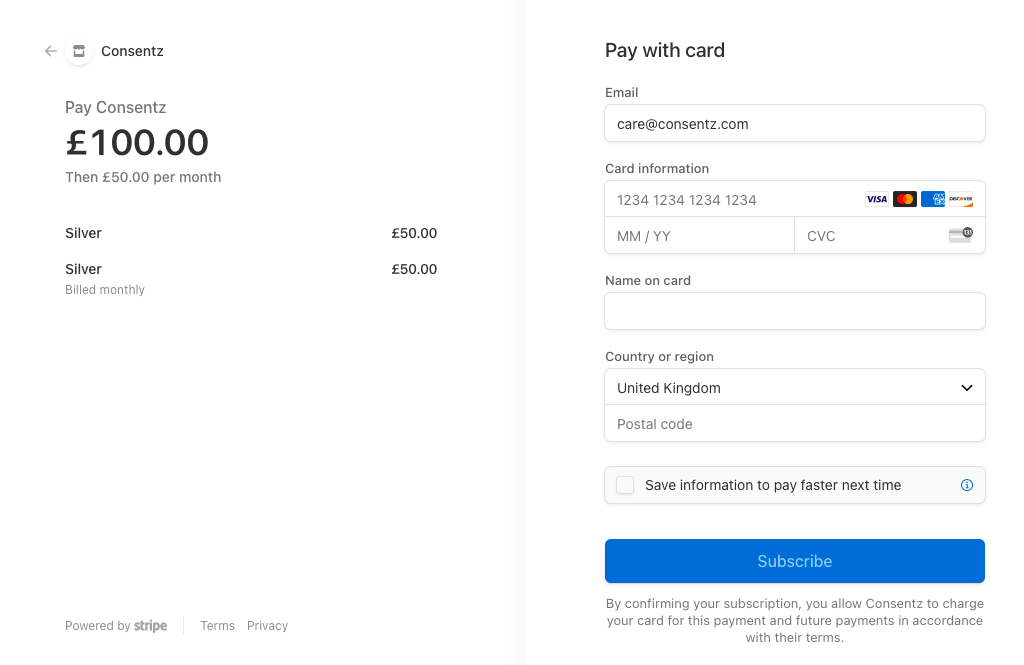
- Once completed you will be returned to the Control Centre – Membership Plan page
- The membership plan will appear on the patient record. If it is not apparent, please refresh the page
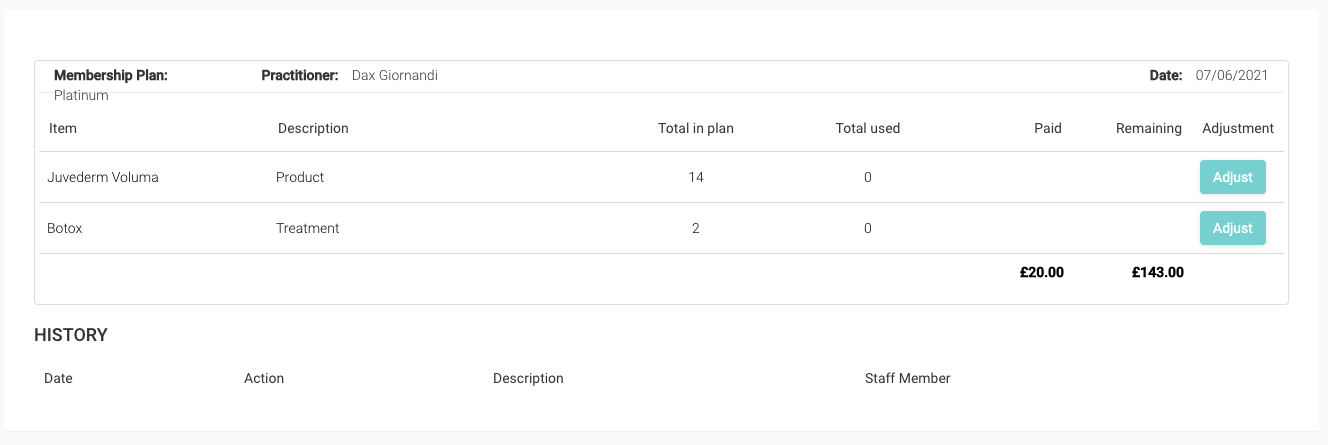
Enrolling into a Membership Plan also creates an invoice on the patient record with up to date payment details. Future payments taken by Stripe will update the invoice automatically.
Recording Usage
Recording usage of a product or treatment as part of the membership plan can be done from this Membership Plan page.
- On the line item you wish to record usage, press the ‘Adjust’ button
- A pop up window will appear where you can record usage
- All adjustments are displayed in the ‘History’ section
