
Blocker reasons allow for the management of structured reasons for adding blockers into the schedule, giving consistency to your calendar. Additional blocker text can be added as before.
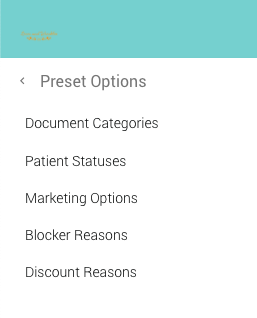
Adding Blocker Reasons
- On the Control Centre select ‘Set Up’ followed by ‘Preset Options’
- Click the ‘Blocker Reasons’ title
- Click the ‘Add New Blocker Reason’ button
- On the pop up window, enter a ‘blocker reason’
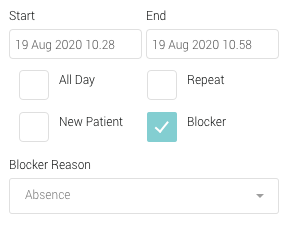
- The reason will be added to the reasons list, and selectable from the Scheduling -> Calendar when adding a blocker.