
A blocker is essentially an appointment without a patient attached – an amount of time to be blocked out for a reason other than attending to a patient. Blockers are created directly within the Calendar on the Control Centre and Practitioner Application, the process is very similar.
From the Control Centre:
- From the Scheduling menu, click “Calendar”
- Select the day view, and select the day where you wish to apply the blocker
- Click the “+” add button, or click at the appropriate start time on the calendar
- The Appointment window will slide in from the left hand side of the screen
- Tick the ‘Blocker’ option so the window resembles the below image
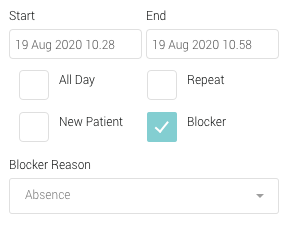
- Practitioner Assign the Blocker to a Practitioner
- Start Record a Start Time
- End Record an End Time
- All-Day Creates an All Day event
- Repeat Allows you to repeat the event
- Blocker Creates a block of Time
- Blocker Reason Assign a reason to the Blocker
- Blocker Text Assign a note to the Blocker
- Book Appointment Create the Blocker
- Click “Start” and select a start time for the Blocker
- Click “End” and select an end time for the Blocker. Note Blockers should not be longer than the a working day, and should start and end on the same day, especially if you plan to repeat them
- Click “Repeat” if you wish to repeat the blocker over a number of days
- Select a “Blocker Reason” from your bespoke list of reasons. These reasons are created on the Control Centre -> Set Up -> Preset Option -> Blocker Reasons page
- Add any additional text into the Blocker Note. This is optional
- Click ‘Book Appointment’ and the Blocker will be added to your calendar
For more information on ‘Blocker Reasons’ please search for ‘Blocker Reasons’ or ‘Preset Options’ in the Academy.