
Preset options makes for easier management of variables on your account, by allowing only certain options to be selectable, for instance ‘Blocker Reasons’.
Preset options can be managed from the Control Centre -> Set Up -> Preset Options page. The ‘Set Up’ menu can be found at the bottom of the Menu Drawer.
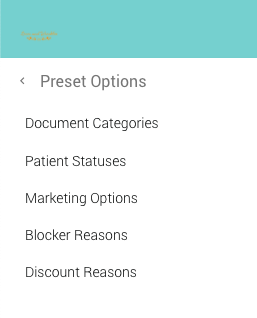
Document Catergories
Document catergories are used to manage patient document uploads, which are found under Patient – Documents on both the Control Centre and the Practitioner App.
- On the Control Centre select ‘Document Catergories’
- Click ”+ Add New Category’
- In the pop up window, enter a name for your category
- The new category will be added to list
- Using the icons next to each category you can disable, edit or delete the respective category if needed
Patient Statuses
Patient Statuses can be assigned to any patient and appear in the form of an icon next to the patient’s name. There are a number of preset statues (eg. ‘Highly valued’), however this section allows you to add to this available list. A patient’s status can be assigned from within the Patient record.
- On the Control Centre select ‘Patient Statues’
- Click ”+ Add New Status’
- In the pop up window, enter a name for your status
- As each status has an ascociated icon, you will be required to add one using the upload icon field. Icons should be in .jpg format and below 300x300px
- The new status will be added to list
- Using the icons next to each status you can edit or delete the respective status if needed
Marketing Options
Marketing Options present themselves to the patient during ‘Patient Mode’ on the practitioner app then the question ‘how did you hear about us’ is posed. Marketing options allow you to recieve feedbakc on various marketing campaigns and understand their relative success.
- On the Control Centre select ‘Marketing options’
- Click ”+ Add New’
- In the new window, enter a title for your marketing campaign
- Tick the ‘Enable’ box if you wish to make this visible
- The new marketing option will be added to list
- Using the icons next to each option you can edit or delete the respective option as needed
Blocker Reasons
Blocker reasons are used to manage blockers added to the calendar on both the Control Centre and Practitioner App. They allow for a common reason to be selected by staff memebers when adding a blocker.
- On the Control Centre select ‘Blocker Reasons’
- Click ”+ Add New Blocker Reason’
- In the pop up window, enter a name for your blocker reason
- The new reason will be added to list
- Using the icons next to each reason you can edit or delete the respective reason as needed
- Active reasons will be available for selection when adding a blocker to the calendar
Discount Reasons
Discount reasons are used when applying a discount to an invoice. They allow for a common reason to be selected by staff memebers when reducing the amount on an invocie.
- On the Control Centre select ‘Discount Reasons’
- Click ”+ Add New Discount Reason’
- In the pop up window, enter a name for your discount reason
- The new reason will be added to list
- Using the icons next to each reason you can edit or delete the respective reason as needed
- Active reasons will be available for selection when adding a discount to an invoice