
Treatment Plans can be created for an individual patient from the Consultation Tool on the Practitioner Application, under the menu item “Treatment Plans”.
They allow you to plan out a course of treatments and assign the lengths of time in between each treatment. This forms the basis for appointments to be scheduled.
You can have numerous Treatment Plans per patient.
- Enter the ‘Consultation Tool’ via the Calendar Appointment, or by selecting the Patient in the Patient List.
- Select ‘Treatment Plans’ from the list on the left hand side of the screen
- A list of existing Treatment Plans for that patient will appear in the main window
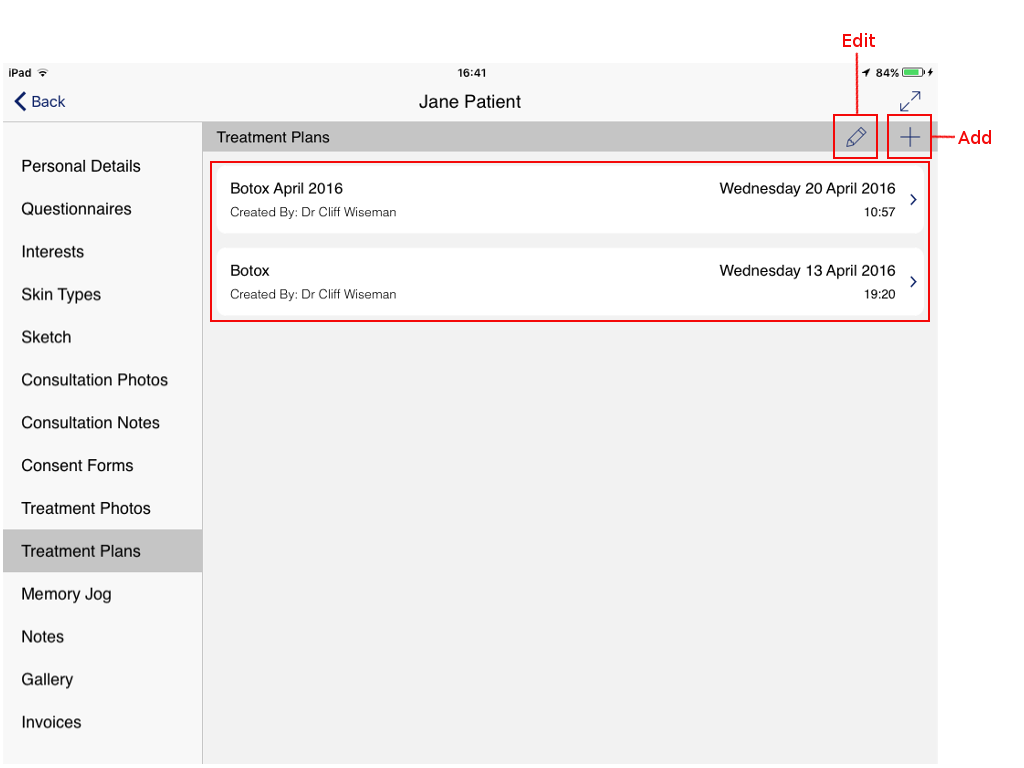
- Edit You can rename an existing Treatment Plan by tapping this button.
- Add Tapping this button will create a new Treatment Plan.
- Tap the “+” button to add a new Treatment Plan.
- Use the keyboard to enter a name for this Treatment Plan.
- Upon completing the naming process, you can tap on the Plan to enter it and begin adding individual treatments to it.
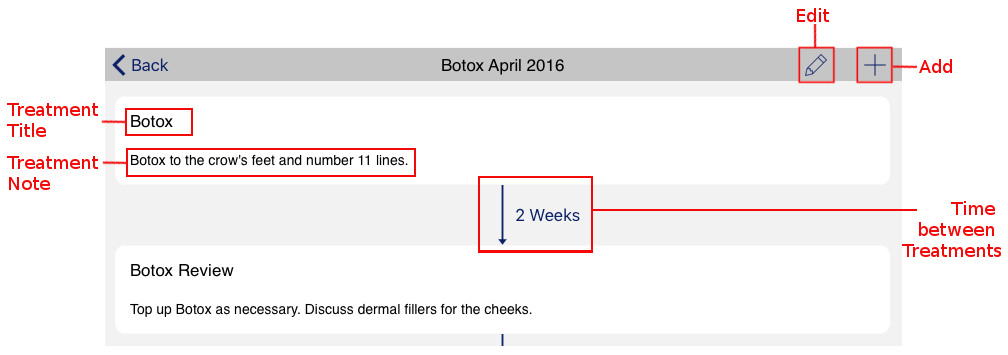
- Edit Tapping the Edit button allows you to edit both the treatment title and the note assigned to it.
- Add Tapping the Add button allows you to add an addition treatment to the Plan.
- Tap the “+” button to add a treatment record to the Plan.
- Each new Treatment record consists of a “Title” and “Notes” field.
- Enter a Text into each field as required.
- Once a second Treatment has been entered, a “Number of Weeks” option appears between them.
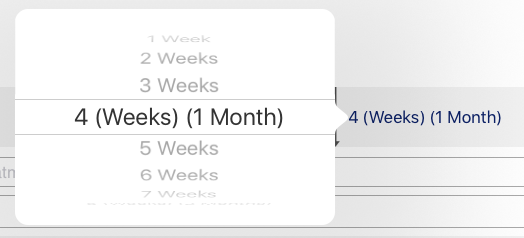
- Tapping on this will produce a scroll wheel where you can select the number of weeks between treatments.
- Once the Treatment Plan is complete, tap the “Done” button at the top right of the screen.
- You can come back and edit a Treatment Plan at any time.
Treatment Plans are shared with your Patients via their Patient Application.