
Treatment Photos can be edited by selecting the photo and tapping the Edit button, portrayed as a pen icon in the Toolbar.
Find out how to enter the Edit mode from the Consultation Tool here.
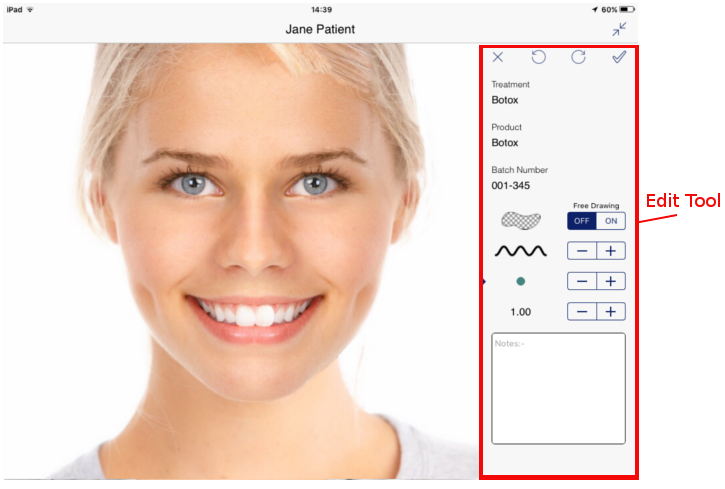
- Enter the ‘Treatment Photo’ and select the photo you wish to Edit
- Tap the Edit button on the far right of the Toolbar
- The Edit Tool will appear from the right hand side of the screen
The File Options along the top of the Edit Tool allow the follow functions:
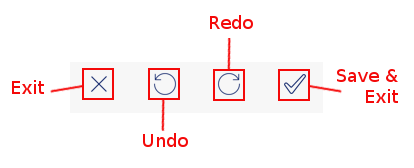
- Exit Exit the tool without saving any changes
- Undo Undo your last action on the photo
- Redo Redo your last undone action
- Save and Exit Save your edits and exit the Edit Tool
The main Tools in the Edit Tools are:
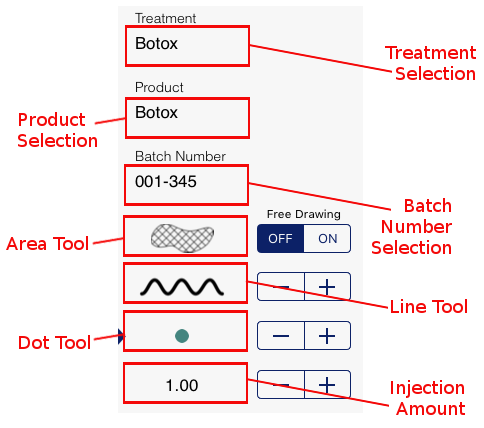
- Treatment Displays a list of available Treatments, selecting one dictates the color used to record the edit, and the following menu option
- Product Once the Treatment has been selected, a list of available Products will be displayed
- Batch Number Once the Product has been selected, a list of available Batch Numbers will be displayed
- Area Tool Draw an area that will be shaded once defined
- Line Tool Draw a line, the thickness can be altered using the + and – buttons
- Dot Tool Draw a dot, the thickness can be altered using the + and – buttons
- Injection Amount The numerical amount registered with each ‘Dot’ recorded
- Notes Record any notes your require in this free text area
Treatment Info Available Treatments, Products and Batch Numbers need to have been set up from the Treatment Menu in Settings, accessible from the Main Home Screen
Treatment Photos appear in the Gallery, and can be shared with you Patient from there.
More information on the Gallery can be found here.