
Patient Photos can be recorded from the Consultation Tool.
Find out how to enter the Consultation Tool here.
There are two types of Photos – Consultation Photos and Treatment Photos:
- Consultation Photos Intended to be taken during your consultation with your patient.
- Treatment Photos Intended to be used to visually record your treatment. Photos taken at the Consultation stage can be copied to Treatment Photo.
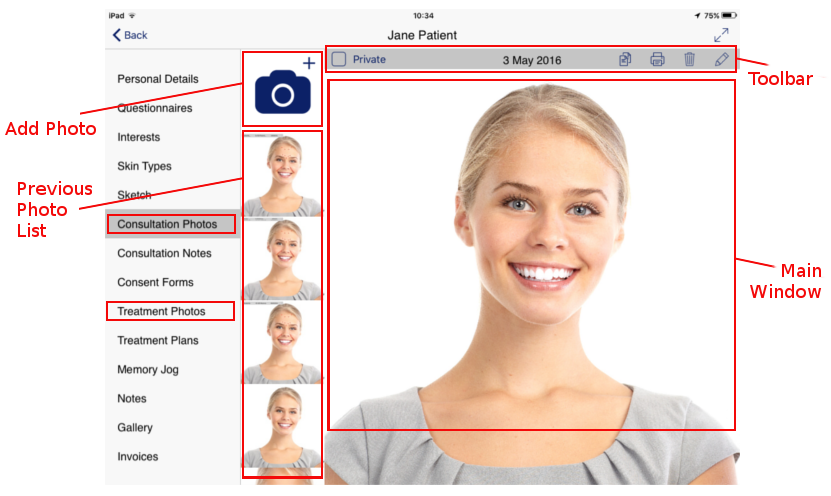
- Enter the ‘Consultation Tool’ via the Calendar Appointment, or by selecting the Patient in the Patient List
- Select either ‘Consultation Photos’ or ‘Treatment Photos’ from the list on the left hand side of the screen
- Any previously taken photos will appear in a vertical list in the main window
- To take a new photo, tap the ‘Add Photo’ icon
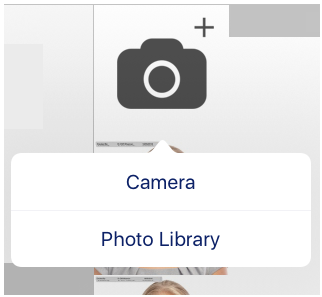
- A small window will appear with the options ‘Camera’ and ‘Photo Library’
- Camera Selecting Camera will allow you to take new photos with the iPad’s camera
- Photo Library Selecting Photo Library will allow you to select an existing photo from your iPad photo library
- Once you have taken, or selected, your photo you will be returned to the Consultation Tool
- The photo will appear in the vertical list in the main viewer
- By tapping the photo, it will appear in the main window
- The tool bar along the top of the photo allows for the following functions:

- Private By selecting this tick box, the photo will be visible only to the Practitioner that recorded it
- Copy Only available from the Consultation Photos, tapping this button allows you to copy photos taken as Consultation Photos to Treatment Photos
- Print Tapping the Printer icon allows you to print the currently selected photo
- Delete Delete the photo. This action is permanent
- Edit By tapping the pen icon you will be taken to the Editing tool
Further information on Photo Editing can be found by following the links below:
How to Edit Consultation Photos can be found here.
How to Edit Treatment Photos can be found here.
More information on the Gallery can be found here.