
Take perfect before and after photos using the ghosting feature.
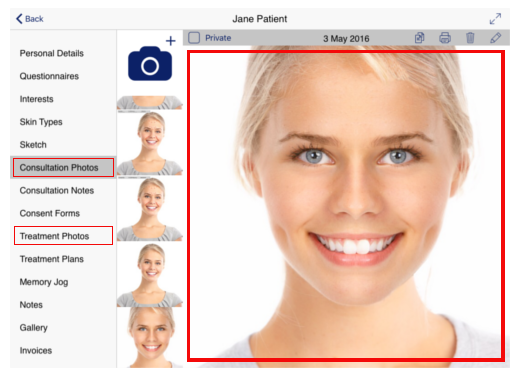
The ghosting feature is intergrated into the photo taking functions of the Consentz application and is therefore available in the “Consultation Photos” and “Treatment Photos” tab of any Patient File.
- From the Patient section, select your patient
- Select either “Consultation Photos” or “Treatment Photos” from the left hand menu
- Select the photograph you wish to use as the ghosting image – the “before” in the “before and after” images. The image selected and displayed in the right hand portion of the screen will form the ghost image overlay.
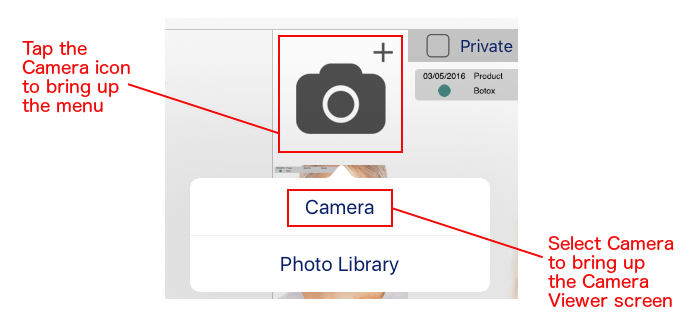
- Tap the camera icon and select the “Camera” option from the choices avaialble.
- This will load the camera application, with the ghosting feature enabaled
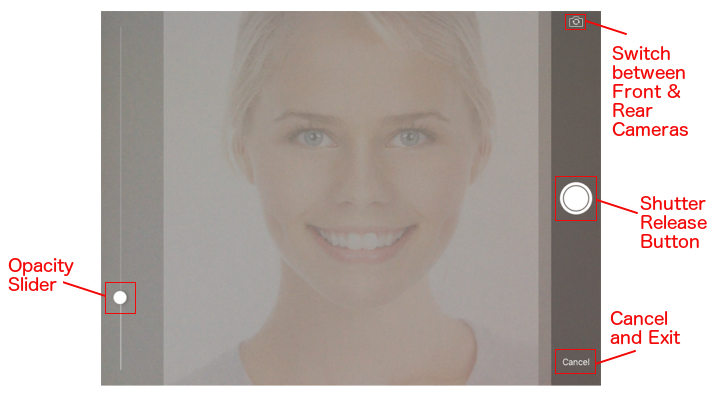
- Slider The slider on the left controls the opacity of the ghosting image (in other words it makes it darker or lighter)
- Rotate Camera Tapping this symbol will switch between the front and rear cameras
- Shutter Release Button This circular button will take a photo
- Cancel Tapping here will exit the Camera application and take you back to the Patient Area
- Once you have lined up your patient with their previous image you can take a photo by pressing the on screen shutter release button on the right of the viewing screen.
- You can now compare you before and after shots using the “Gallery” tab.
Please Note : The ghosting image overlay does not appear in the final image – it is there as a guide only – irrespective of how light or dark you make it